

Retaining Wall How to Install: Block Wall Guide for DIY Beginners
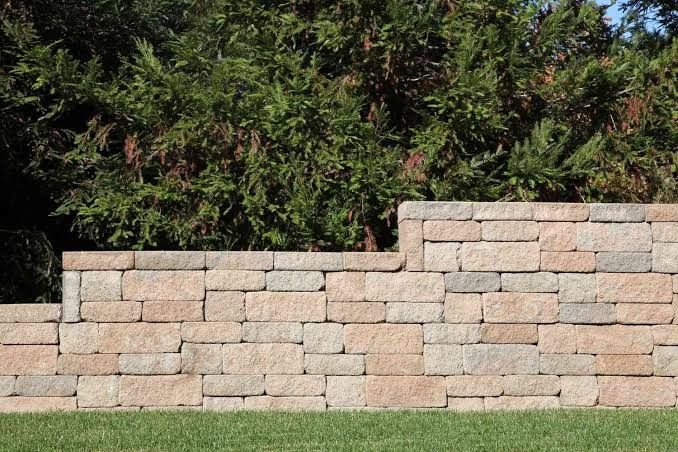 The slope in your backyard is eroding, the flower bed at the top keeps washing out, and every time it rains, mud runs down onto the patio. You need a retaining wall, but the quotes from landscapers are $3,000 to $6,000 for a wall that looks simple enough to build yourself. The question is whether you can actually do it — and whether the wall will still be standing in five years.
A retaining wall is a relatively rigid wall used for supporting soil laterally so that it can be retained at different levels on the two sides (Wikipedia). A well-built retaining wall prevents erosion, creates usable flat space on a sloped lot, and adds visual structure to the landscape. The key to a successful DIY retaining wall is proper planning, correct base preparation, and adequate drainage.
Retaining wall how to install with interlocking concrete blocks is a straightforward DIY project for walls up to four feet tall. Here is everything you need to know for a successful build.
Planning Your Retaining Wall
Planning is the most critical step in retaining wall installation. A wall built without a plan will fail within a few years. The planning process determines the wall height, length, materials needed, and whether a permit is required.
Determine the wall height. Measure the vertical distance from the base of the wall to the top of the soil behind it. Walls under three feet tall are typically DIY-friendly with standard retaining wall blocks. Walls three to four feet tall require geogrid reinforcement and more careful engineering. Walls over four feet tall should be designed and built by a professional engineer or landscape contractor.
Check local building codes and permit requirements. Most municipalities require a permit for retaining walls over three feet tall. Some require an engineer’s stamped plan for walls over four feet. The permit fee is $50 to $200. Building a wall without a required permit can result in fines and an order to remove the wall if it does not pass inspection.
Calculate the number of blocks needed. Multiply the wall length in feet by 12 and divide by the block face width in inches. Add 5 to 10 percent for breakage and cuts. For a 4-inch-tall block, multiply the wall height in feet by 3 to get the number of courses. Multiply the blocks per course by the number of courses to get the total blocks needed.
Mark the wall location with stakes and string. The wall should be set back from the top of the slope by at least two feet to ensure stability. The base trench should be wide enough to accommodate the blocks plus six inches of gravel on each side for drainage.
Choosing Retaining Wall Materials
The most common materials for DIY retaining walls are interlocking concrete blocks, natural stone, and treated timber. Concrete blocks are the most popular choice for their durability, ease of installation, and clean appearance.
| Material | Cost per sq ft | Max height | Difficulty
|
| Interlocking concrete block | $10u2013$20 | 4 ft | Moderate |
| Natural stone | $20u2013$40 | 3 ft | Hard |
| Treated timber | $8u2013$15 | 3 ft | Easy |
| Segmental retaining wall block | $12u2013$25 | 6 ft (with geogrid) | Moderate |
Interlocking concrete blocks are the best choice for most DIY retaining walls. They have a lip on the back that locks each course to the one below it, creating a structurally stable wall without mortar. The blocks are available in a range of colors and textures that mimic natural stone. Standard retaining wall blocks cost $2 to $5 each and cover about 1 square foot of wall face per block.
Natural stone walls use stacked fieldstone or flagstone without mortar. Dry-stacked stone walls are the most natural-looking but require skill to fit the stones together. Stone walls are harder to build and more expensive than concrete block walls but can last indefinitely with proper drainage.
Treated timber walls are the least expensive option. Landscape timbers are stacked and held together with steel spikes or rebar. Timber walls are suitable for short walls under three feet but are less durable than stone or concrete. Treated timber lasts 10 to 15 years before the wood begins to decay.
Tools and Materials Needed
Building a retaining wall requires a specific set of tools. Most can be rented from equipment rental yards if you do not own them.
Tools needed: a tape measure, string line, level (at least 4 feet long), rubber mallet, shovel, wheelbarrow, hand tamper or plate compactor, circular saw with a masonry blade for cutting blocks, and safety glasses and gloves. A plate compactor is essential for compacting the base gravel — hand tamping a retaining wall base is insufficient for walls over two feet tall.
Materials needed: retaining wall blocks, crushed stone or gravel for the base and backfill, landscape fabric to separate the gravel from the soil, drainage pipe if the wall is over three feet tall, cap blocks for the top course, and construction adhesive for the cap blocks. Geogrid reinforcement is needed for walls over three feet tall and is available in rolls from retaining wall suppliers.
The total material cost for a 20-foot-long, 3-foot-high retaining wall in concrete blocks is $500 to $1,200. Adding a base of 6 inches of crushed stone and backfill of 12 inches of gravel adds $100 to $300. Cap stones add $50 to $150. Geogrid for walls over three feet adds $100 to $300.
How to Install a Retaining Wall Step by Step
Follow these steps for retaining wall how to install with interlocking concrete blocks. The process takes two to four days for a 20-foot-long wall depending on the height and your experience level.
Step 1: Excavate the base trench. Dig a trench along the marked wall line, 6 to 8 inches deep and at least 12 inches wider than the blocks. The trench must be level — any slope in the base will be amplified as the wall gets taller. Use a long level to check the trench bottom in both directions.
Step 2: Add and compact the base gravel. Fill the trench with 4 to 6 inches of crushed stone. Compact the stone in 2-inch lifts using a plate compactor or hand tamper. The compacted base must be level and solid. A well-compacted base is the single most important factor in the wall’s long-term stability.
Step 3: Install the first course of blocks. Place the first row of blocks on the compacted base. Each block must be level front to back and side to side. Tap blocks into place with a rubber mallet. Check the level frequently and adjust by adding or removing gravel under individual blocks. The first course determines the alignment of the entire wall.
Step 4: Backfill behind the first course. Add 4 to 6 inches of crushed stone behind the first course of blocks. Wrap landscape fabric around the backfill material. The gravel allows water to drain through the wall instead of building up pressure behind it. For walls over three feet tall, install a perforated drainage pipe at the base of the backfill, sloped to drain at one end.
Step 5: Install additional courses. Stack the second course of blocks on top of the first, offsetting the vertical seams by at least half a block width. The interlocking lip on the back of each block automatically sets the setback — typically 1 inch per course. Continue stacking, backfilling with gravel behind each course, and compacting the backfill.
Step 6: Install geogrid for walls over three feet. Lay geogrid sheets between courses at the height specified by the manufacturer. The geogrid extends horizontally into the backfill to reinforce the soil behind the wall. Cover the geogrid with backfill and compact before adding the next course of blocks.
Step 7: Install cap stones and finish. Apply construction adhesive to the top course of blocks and place cap stones. Caps give the wall a finished appearance and lock the top course in place. Backfill the remaining area behind the wall with topsoil for planting or grading. Plant ground cover on the backfill to prevent erosion.
A landscape contractor with 20 years of experience explained: “The number one reason retaining walls fail is poor drainage. Water builds up behind the wall and the pressure pushes it over. Make the drainage gravel and pipe your priority — it is not negotiable.”
Drainage — The Key to a Long-Lasting Wall
Drainage is the most important factor in retaining wall longevity. Without proper drainage, water accumulates behind the wall and creates hydrostatic pressure that can push the wall over. Proper drainage eliminates this pressure and keeps the wall stable.
Backfill with crushed stone, not soil. The space behind the wall should be filled with 3/4-inch crushed stone for a width of at least 12 inches. Crushed stone allows water to drain down to the base of the wall instead of pooling behind it. Soil holds water and creates pressure against the wall.
Install a perforated drainage pipe at the base. A 4-inch perforated pipe wrapped in filter fabric is laid at the base of the backfill and sloped to drain at one end. The pipe carries water from the backfill to a discharge point away from the wall. The slope must be at least 1/4 inch per foot for proper drainage.
Use landscape fabric to separate the backfill gravel from the surrounding soil. The fabric prevents soil from washing into the gravel and clogging the drainage system. Without fabric, the gravel fills with soil over time and the drainage system stops working.
Weep holes through the wall face provide additional drainage for walls over three feet tall. Weep holes are 1-inch gaps left between blocks at the base of the wall, spaced every 3 to 4 feet. Water seeps through the weep holes instead of building up pressure behind the wall.
Retaining Wall Mistakes to Avoid
Skipping the permit is a common mistake. Building a retaining wall without a permit when one is required can result in fines up to $5,000 and an order to remove the wall. Check with your local building department before starting any wall over three feet tall.
Inadequate base preparation is the most common cause of wall failure. The base must be excavated to solid soil or compacted fill, and the gravel base must be compacted with a plate compactor. Hand tamping is not sufficient for walls over two feet tall. A wall built on an inadequate base will settle and lean within the first year.
Failing to account for slope is another common error. The wall must be built with a slight backward lean — typically 1 inch per foot of height — to resist the outward pressure of the soil behind it. Interlocking block walls achieve this lean automatically through the lip design, but the blocks must be installed correctly for the lean to work.
Not extending the wall below frost depth in cold climates is a frequent problem in northern regions. Frost heave pushes the base of the wall upward, causing the wall to lean and crack. The base of the wall should extend below the frost line — typically 3 to 4 feet in northern climates. For short walls, a deeper gravel base provides frost protection.
Frequently Asked Questions
How tall can a retaining wall be without a permit?
Walls under three feet usually do not need a permit. Walls three feet and taller typically require a permit and may need an engineer stamp over four feet.
What is the cheapest retaining wall material?
Treated timber is cheapest at $8 to $15 per square foot. Concrete blocks are $10 to $20. Natural stone is the most expensive at $20 to $40.
Do all retaining walls need drainage?
Yes, drainage is essential for walls over two feet. Water pressure behind the wall without drainage can push the wall over. Gravel and pipe are required for stability.
Do I need geogrid for my retaining wall?
Geogrid is recommended for walls over three feet tall. It reinforces the soil behind the wall and prevents the wall from leaning outward over time. Some block manufacturers require geogrid for warranty coverage on tall walls.
How deep should the base of a retaining wall be?
The base trench should be 6 to 8 inches deep for gravel. In cold climates, the base must extend below the frost line to prevent frost heave damage to the wall.
Can I build a retaining wall on a slope?
Yes, the base must be cut into the slope. Stepped walls with sections at different heights work on steep slopes.
How long does a retaining wall last?
Concrete block walls last 30 to 50 years. Stone walls last 50 to 100 years. Treated timber walls last 10 to 15 years. Lifespan depends on drainage and frost exposure.
How much does it cost to build a retaining wall DIY?
DIY concrete block walls cost $15 to $30 per square foot. A 20-foot by 3-foot wall costs $900 to $1,800 in materials.